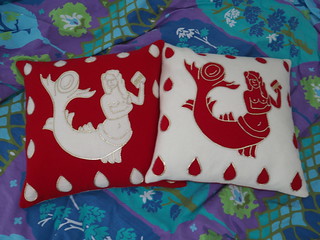
This was one of 2016-2017's secret projects - a pair of pillows in sewn intarsia.
This was initially conceived as a no-occasion gift for a dear friend, whose heraldry includes a red mermaid on a white background. The original design featured only the mermaid. However, when she was announced for the SCA's Order of the Pelican, it was a little too perfect. The mermaids had already been cut, and one sewn back together, but there was enough space to add the border of blood drops, and this gave me a firm deadline!
Intarsia, as pertains to sewing/embroidery, not knitting, is sort of like an un-backed applique. Instead of putting a design on a ground fabric, two identical designs are cut and exchanged, and then carefully stitched back into a solid piece with a whip stitch joining raw edges that are just butted together. The examples I know of are late medieval and Scandinavian, I'm not sure if it was more widely used than that - when I first saw them in Stockholm, I'd never heard of this before, and there don't seem to be many resources on it in English. Extant pieces seem to be home and church textiles, such as bedcoverings and cushions. The fabrics I used were red and cream/white wool flannels, I believe from Wm. Booth Draper, sewn with linen thread. The couched edging and details are ~2-2.5mm strips of "gold" goatskin leather, surprisingly cheap from Tandy's outlet store. The wool was all joined before I started the couching, so there are two layers of stitching everywhere that the leather is over a join. The backs of the pillows are in the opposite color wool, and it all encloses a feather pillow.
This was definitely a learning project; I jumped in hoping to figure it out as I went along. Although I did simplify the mermaid design, I could have gone further with that. Points and sharp corners really don't work well here! Sewing around raw edges is tricky, too close or too tight and you can pull the weave apart. In general, tighter weaves would be better. Finally, for drawing in my detail lines, I used my soapstone marker on the red (brushed off fine) and pink chalk on the white, which remained way too visible! In the end, I had to wash the whole panel. Yes, that's right, I stuck non-prewashed red and white wools, plus leather, in a sink full of water hoping to get pink spots out (not add more)! Everything turned out fine, but it was nerve-wracking.
Showing posts with label embroidery. Show all posts
Showing posts with label embroidery. Show all posts
10 August 2017


18 November 2016
The finished brick stitch purse
Well hello there! Things have been happening, but not making it to the blog. I haven't had any large clothing projects to encourage me to post, and a fair bit of my crafting time has diverted to metalwork and enamel.
The last picture of this was just the embroidery, flat. The next step was lining. I fully backed the embroidery with a lightweight linen, raw edges to the inside, before folding to a pouch shape. Then folded in half, the sides were whipstitched together going through both lining and embroidery ground. Those edges were then covered in a tubular tablet woven-edging (4 cards, threaded for wide diagonals and set for a chevron). That edging continues up across the top edge opening. In theory, the edging could also be the initial stitching holding the edges together, but I was happier having that already lined up perfectly and stable. The carrying string and the drawstring are both fingerloop braids. The handle string is a six-loop braid ( A grene dorge of vj bowes -- c. 1475), using full strands of the embroidery silk. For the drawstring, which needed to be thin, I split the silk from 2-ply to single, and then used the divided five loop braid to make two matching strings. And finally, tassels. There's a whole skein of silk in those three.
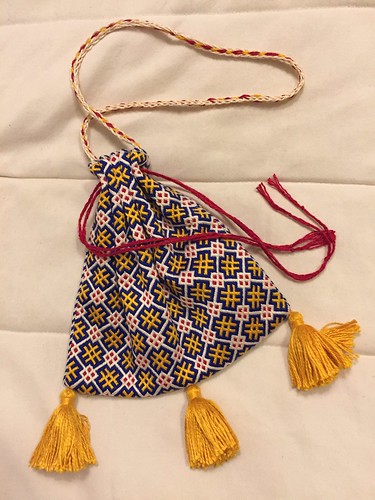
The last picture of this was just the embroidery, flat. The next step was lining. I fully backed the embroidery with a lightweight linen, raw edges to the inside, before folding to a pouch shape. Then folded in half, the sides were whipstitched together going through both lining and embroidery ground. Those edges were then covered in a tubular tablet woven-edging (4 cards, threaded for wide diagonals and set for a chevron). That edging continues up across the top edge opening. In theory, the edging could also be the initial stitching holding the edges together, but I was happier having that already lined up perfectly and stable. The carrying string and the drawstring are both fingerloop braids. The handle string is a six-loop braid ( A grene dorge of vj bowes -- c. 1475), using full strands of the embroidery silk. For the drawstring, which needed to be thin, I split the silk from 2-ply to single, and then used the divided five loop braid to make two matching strings. And finally, tassels. There's a whole skein of silk in those three.
01 February 2016
22 July 2015
Historical Sew Monthly: not going as planned
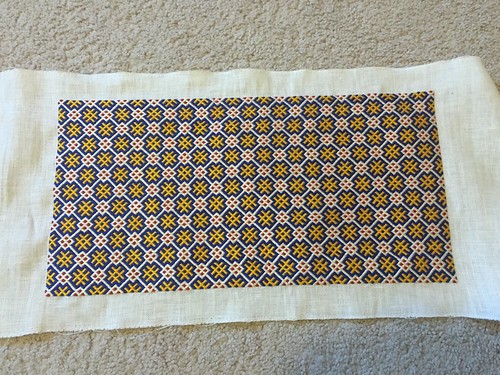
I think I'm falling off the HSM wagon. I did make an entry for the June challenge - men's 14th c. braies and hose, but they didn't turn out as well as I'd hoped. Usable, yes, and they look decent (although late in the day I had a *lot* of sag in the hose), but there are definitely things I'll change when I attempt this again. Minor adjustments on the hose, but I'll probably start from scratch with different construction for the braies.
For the July Accessories challenge, I wanted to finish my brick-stitch pouch. I knew that was going to be a stretch goal, and it's not going to happen. If I had left it the size I originally started with, it would be done by now. If I could leave it at the size after the first enlargement, I could probably still finish, although it'd be tight. And in both cases I would have a pouch that wouldn't hold my new phone (at all, or comfortably, respectively). And so I need to embark on a second round of enlargement. My heart sinks at the thought of it. I am tired of this project.
I may see about doing something else smaller for the July challenge, but my energy for working on projects has been pretty low. I did start a hat (felted, not sewn), but I'll need to borrow some of the tools to finish it, which isn't going to happen in the next week.
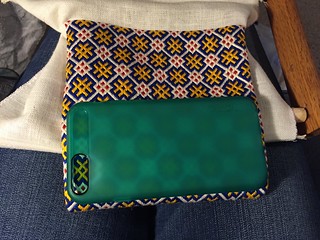
For the July Accessories challenge, I wanted to finish my brick-stitch pouch. I knew that was going to be a stretch goal, and it's not going to happen. If I had left it the size I originally started with, it would be done by now. If I could leave it at the size after the first enlargement, I could probably still finish, although it'd be tight. And in both cases I would have a pouch that wouldn't hold my new phone (at all, or comfortably, respectively). And so I need to embark on a second round of enlargement. My heart sinks at the thought of it. I am tired of this project.
I may see about doing something else smaller for the July challenge, but my energy for working on projects has been pretty low. I did start a hat (felted, not sewn), but I'll need to borrow some of the tools to finish it, which isn't going to happen in the next week.
14 May 2014
Mostly quiet on the sewing front
I've been on a bit of a hiatus from my big sewing projects, so I haven't had a lot of new material to post here. I did remake the sleeves on the black kirtle (much better!), and I just need to add a lining and a new lacing cord to consider that finished. The next step is the outer gown, and although I know I want to fully line it, I'm not sure with what. Until I figure that out, that project's on hold.
I've been working on the embroidered pouch in little bits here and there. Right now, I need to decide on my finished dimensions before I go much farther. The current width is about the minimum for me to get my hand into comfortably; I'm strongly leaning towards adding another half-repeat which would put it at about 5 inches, for more room and better symmetry. The finished pouch should be approximately square, so I'll need to embroider something twice as tall as it is wide.
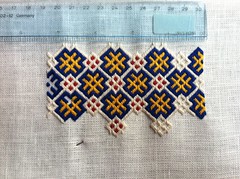
I've been working on the embroidered pouch in little bits here and there. Right now, I need to decide on my finished dimensions before I go much farther. The current width is about the minimum for me to get my hand into comfortably; I'm strongly leaning towards adding another half-repeat which would put it at about 5 inches, for more room and better symmetry. The finished pouch should be approximately square, so I'll need to embroider something twice as tall as it is wide.
29 April 2014
New project: embroidered pouch
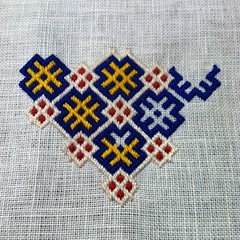
I have long admired (and coveted) the brick stitch pouches that a few of my friends have. So there was only one solution... make my own! Richard Wymarc's article on brick stitch embroidery is fantastically helpful, and I've adapted the pattern from one of the extant pieces to use the colors I wanted. I'm working with commercial silk embroidery floss on a 32ct linen ground. The embroidery itself is fairly simple, and now that I've got the pattern well established, it's easier to work without looking at my diagram too often. Still, no completely filled design is exactly fast to work...
Subscribe to:
Posts (Atom)